Tattoo & Piercing Aftercare Instructions
Tattoo Aftercare
Reef Side Tattoo & Piercing: Tattoo Aftercare Instructions
Step 1: Initial Bandaging
- For the first three days after receiving your tattoo, use Derm Shield as your tattoo bandage. This product is specially selected for its protective and healing properties.
Step 2: First Switch to Lotion
- After removing the Derm Shield, apply an unscented lotion such as Lubriderm to the tattooed area. Continue using the lotion for the next three to seven days to promote healing and moisturize the skin.
Alternative Step for Sensitive Skin
- If you have sensitive skin and choose not to use Derm Shield, apply a suitable alternative like Aquaphor, Hustle Butter, or another product from our in-store selection for the first three days.
Step 3: Final Days of Lotion Use
- Whether you started with Derm Shield or an alternative product, switch to an unscented lotion after the initial three days. Use the lotion for the remaining three days to continue the healing process.
Step 4: Long-Term Care
- Once your tattoo has fully healed, maintain the brightness of the pigment by regularly applying a tattoo-specific lotion.
Reef Side Tattoo & Piercing: Sensitive Skin Tattoo Aftercare Instructions
Step 1: Initial Application
- For clients with sensitive skin who cannot use Derm Shield, begin your aftercare by applying Aquaphor to the tattooed area. This should be done for the first three days after getting your tattoo to protect the area and begin the healing process.
Step 2: Transition to Lotion
- After the initial three days using Aquaphor, switch to an unscented lotion such as Lubriderm. Apply the lotion to the tattooed area for the next three to seven days. This will continue to moisturize and heal the skin without causing irritation.
Step 3: Continue Lotion Use
- Continue applying the unscented lotion until the tattoo is fully healed. This will help to ensure that the tattoo heals properly and remains well-moisturized.
Step 4: Long-Term Care
- After the tattoo has completely healed, it is advisable to maintain the vibrancy of your tattoo’s pigment by regularly using a specialized tattoo lotion.
Following these steps will provide a safe and effective healing process for those with sensitive skin.
Piercing Aftercare
Bridge Piercing
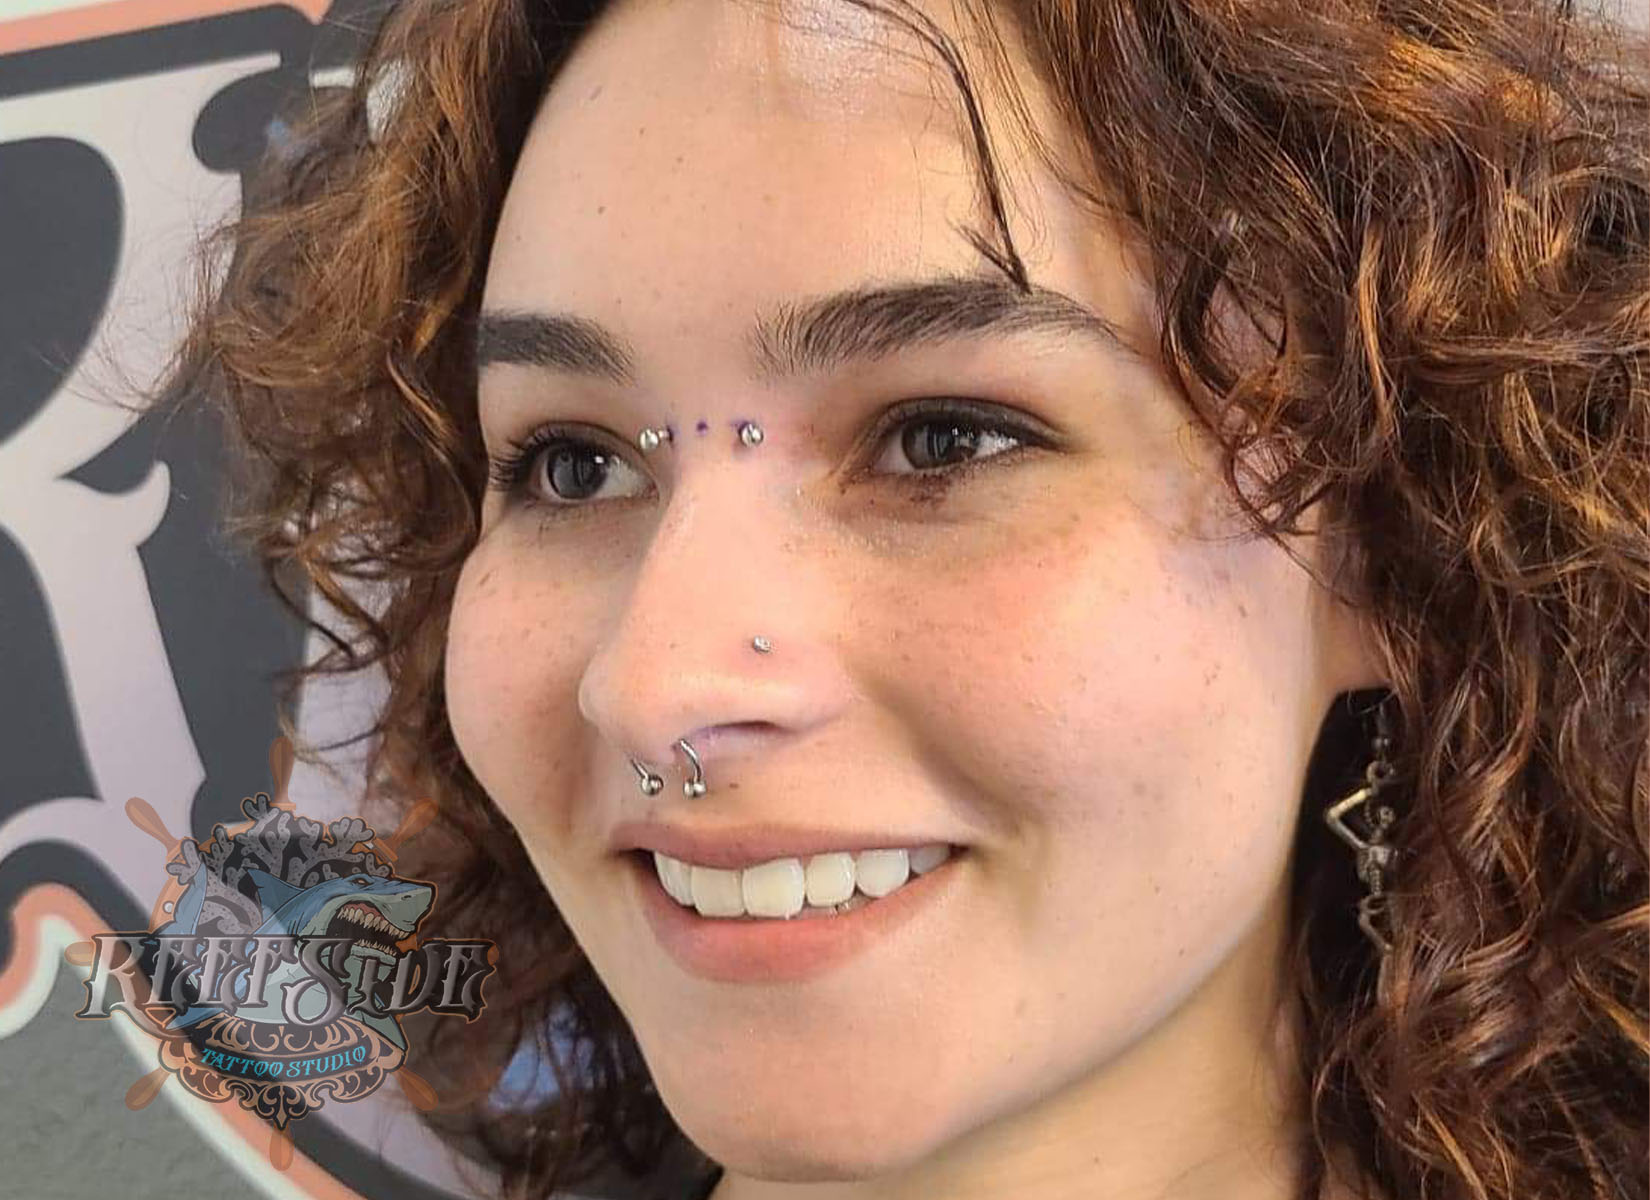
HEALING TIME– Bridge piercings typically heal faster than other nose piercings because they only pass through a bit of skin. The healing process usually takes around 2 to 3 months.
Keep in mind that tissue heals from the outside in, so your piercing might look to recover sooner, but that doesn’t mean it is.
PIERCING AFTERCARE– Always make sure your hands are clean. Every morning and night wash with warm water and unscented soap. Saline spray three times a day. Make sure you check your balls every day as sometimes they like to wiggle loose.
What Not to do with your new Bridge piercing.
DO NOT USE ANY OF THE FOLLOWING PRODUCTS:
No chlorine, no ocean water for 4 weeks. No soaking any piercings for 4 weeks. No alcohol, no peroxide, no neosporin, and do not touch, or play with your new piercing with your fingers. You do not want your oils to get into the wound, doing this and using the products listed above will cause rejection to the piercing.
Conch Piercing
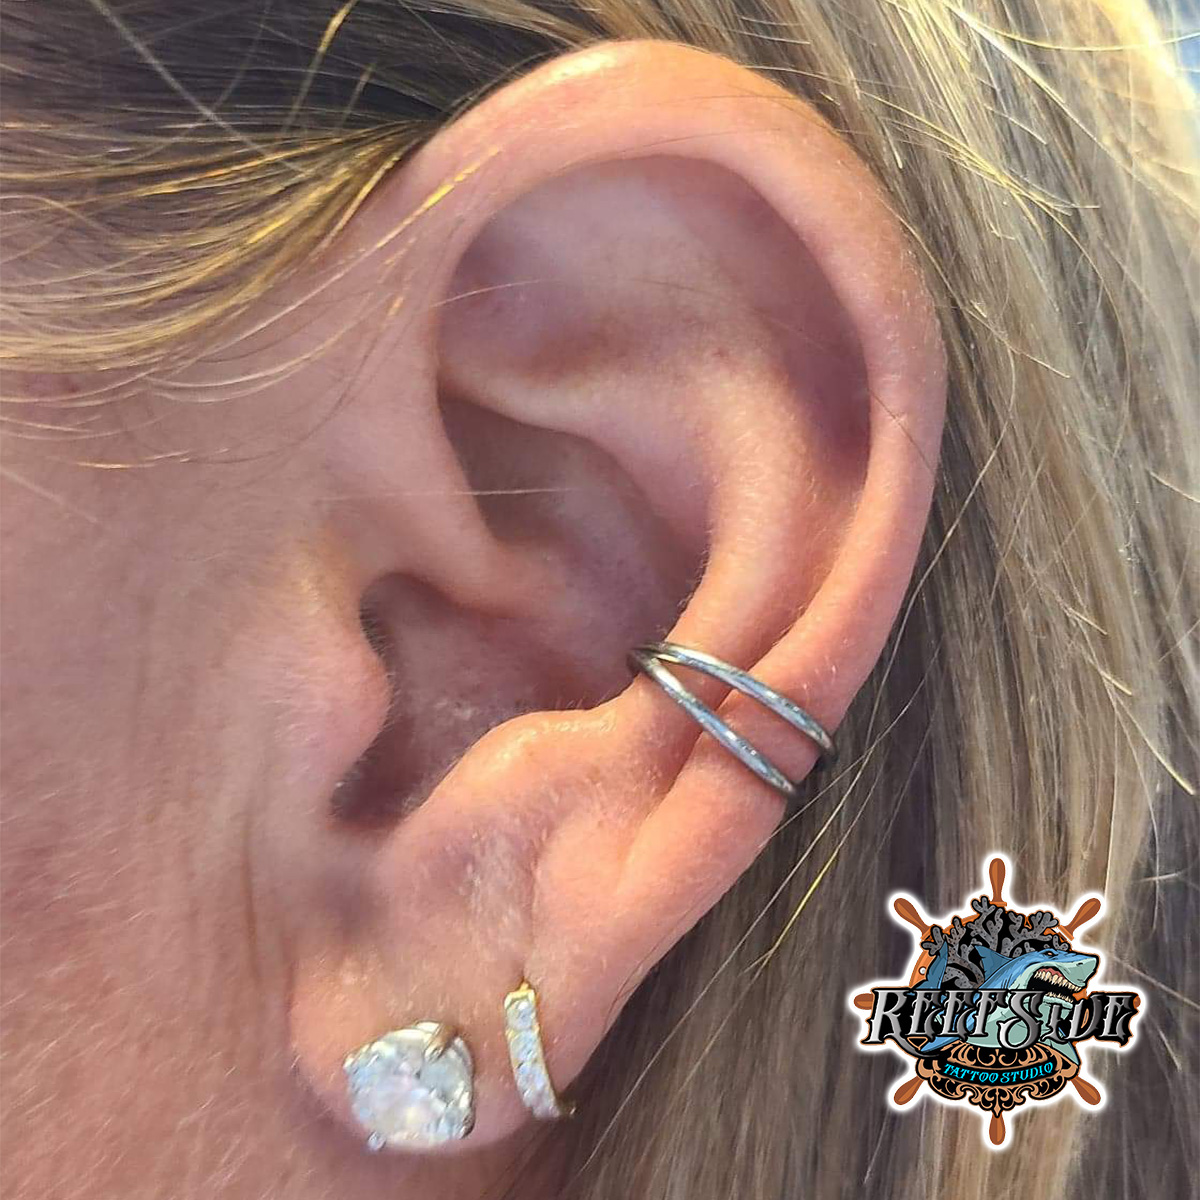
Keep in mind that tissue heals from the outside in, so your piercing might look heal a lot sooner — but that doesn’t mean it is.
PIERCING AFTERCARE– always make sure your hands are clean. Morning and night wash with warm water and nonscented soap. Saline spray three times a day. Make sure you check your balls every day. Sometimes they like to wiggle loose.
What Not to do with your new Conch piercing.
DO NOT USE ANY OF THE FOLLOWING PRODUCTS:
No chlorine, no ocean water for 4 weeks. No soaking any piercings for 4 weeks. No alcohol, no peroxide, no neosporin, and do not touch, or play with your new piercing with your fingers. You do not want your oils to get into the wound, doing this and using the products listed above will cause rejection to the piercing.
Cyber Bites Piercing

Keep in mind that tissue heals from the outside in, so your piercing might look heal a lot sooner — but that doesn’t mean it is.
PIERCING AFTERCARE– always make sure your hands are clean. Morning and night wash with warm water and nonscented soap. Saline spray three times a day. Make sure you check your balls every day. Sometimes they like to wiggle loose.
What Not to do with your new cyber bite's piercing.
DO NOT USE ANY OF THE FOLLOWING PRODUCTS:
No chlorine, no ocean water for 4 weeks. No soaking any piercings for 4 weeks. No alcohol, no peroxide, no neosporin, and do not touch, or play with your new piercing with your fingers. You do not want your oils to get into the wound, doing this and using the products listed above will cause rejection to the piercing.
Daith Piercing
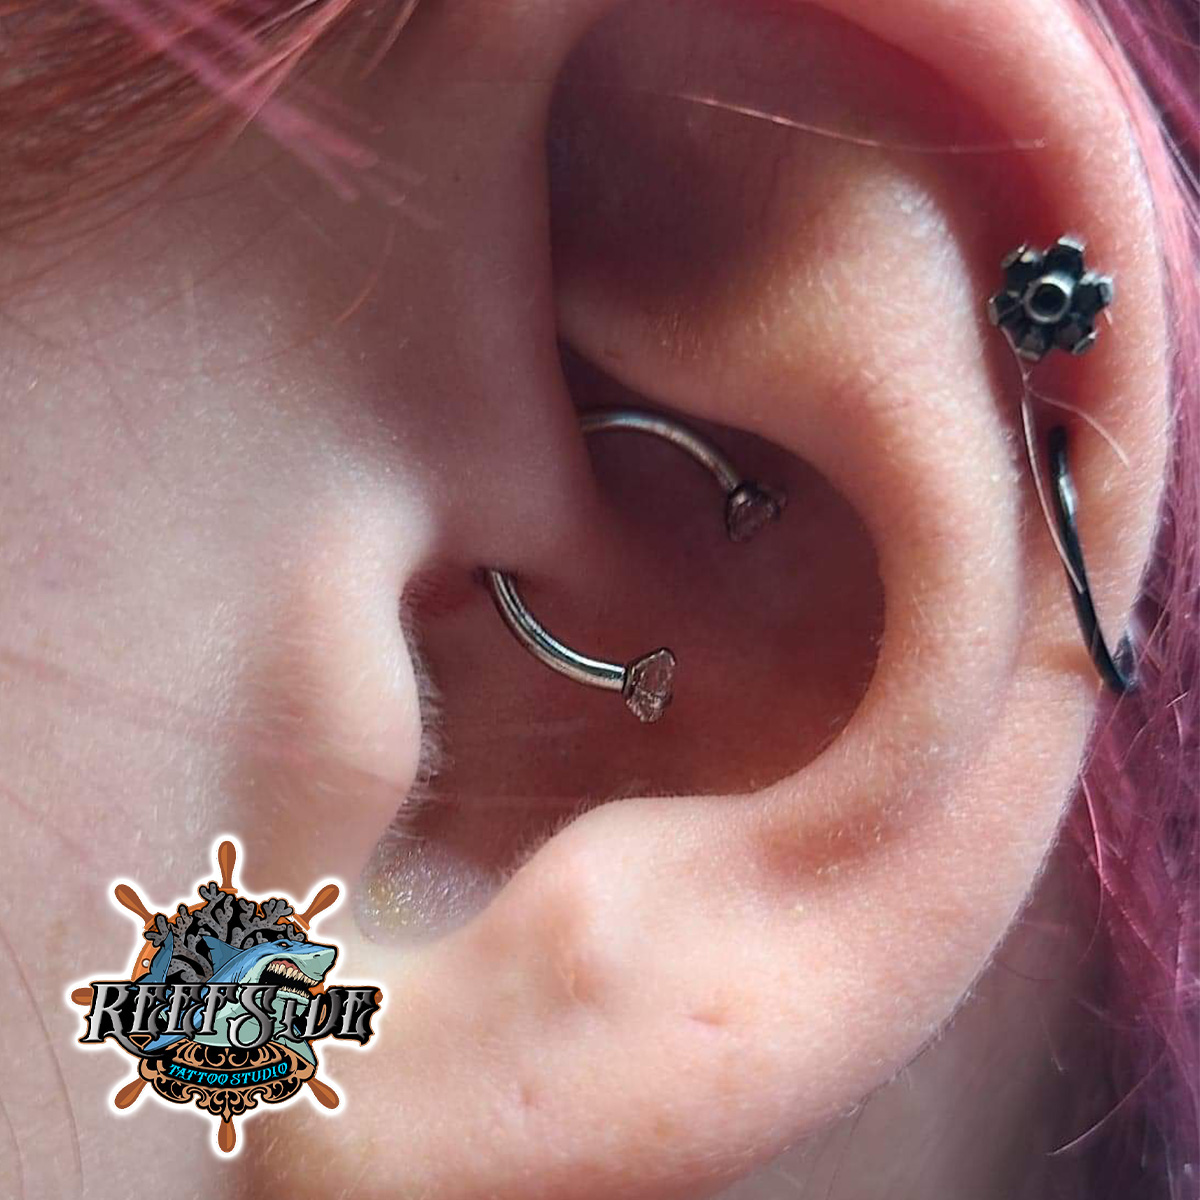
PIERCING AFTERCARE– always make sure your hands are clean. Morning and night wash with warm water and nonscented soap. Saline spray three times a day. Make sure you check your balls every day. Sometimes they like to wiggle loose.
What Not to do with your new Daith piercing.
DO NOT USE ANY OF THE FOLLOWING PRODUCTS:
No chlorine, no ocean water for 4 weeks. No soaking any piercings for 4 weeks. No alcohol, no peroxide, no neosporin, and do not touch, or play with your new piercing with your fingers. You do not want your oils to get into the wound, doing this and using the products listed above will cause rejection to the piercing.
Angel Bite Piercing

Keep in mind that tissue heals from the outside in, so your piercing might look heal a lot sooner — but that doesn’t mean it is.
PIERCING AFTERCARE– always make sure your hands are clean. Morning and night wash with warm water and nonscented soap. Saline spray three times a day. Make sure you check your balls every day. Sometimes they like to wiggle loose.
What Not to do with your new cyber bite's piercing.
DO NOT USE ANY OF THE FOLLOWING PRODUCTS:
No chlorine, no ocean water for 4 weeks. No soaking any piercings for 4 weeks. No alcohol, no peroxide, no neosporin, and do not touch, or play with your new piercing with your fingers. You do not want your oils to get into the wound, doing this and using the products listed above will cause rejection to the piercing.
Single/Double Nipple Piercing
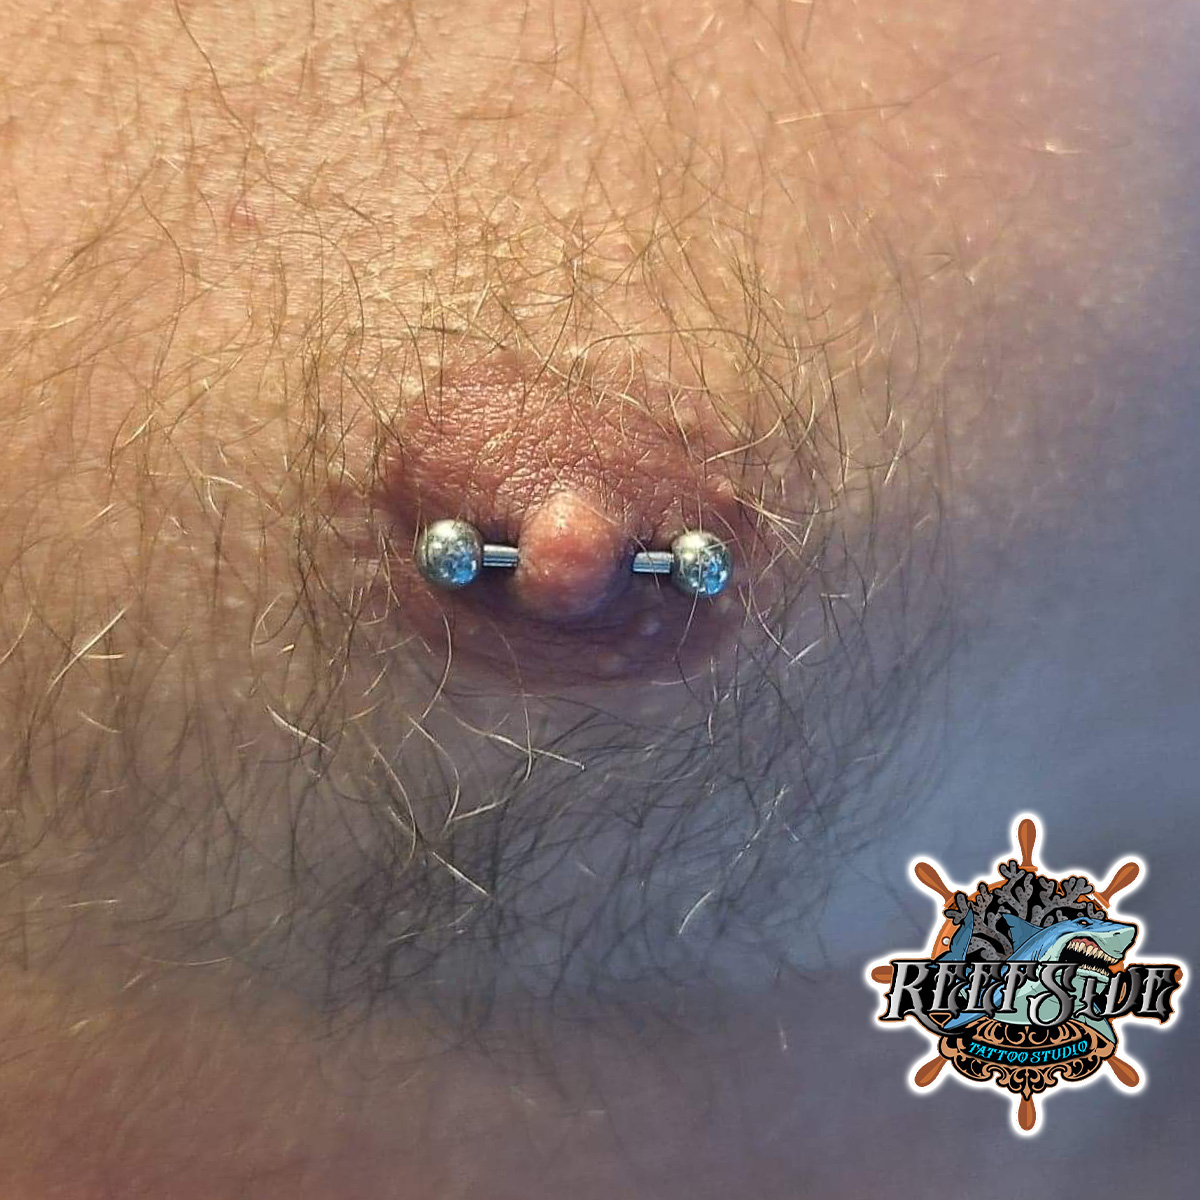
PIERCING AFTERCARE– always make sure your hands are clean. Morning and night wash with warm water and nonscented soap. Saline spray three times a day. Make sure you check your balls every day. Sometimes they like to wiggle loose.
What Not to do with your new Nipple piercing.
DO NOT USE ANY OF THE FOLLOWING PRODUCTS:
No chlorine, no ocean water for 4 weeks. No soaking any piercings for 4 weeks. No alcohol, no peroxide, no neosporin, and do not touch, or play with your new piercing with your fingers. You do not want your oils to get into the wound, doing this and using the products listed above will cause rejection to the piercing.
Eye Brow Piercing
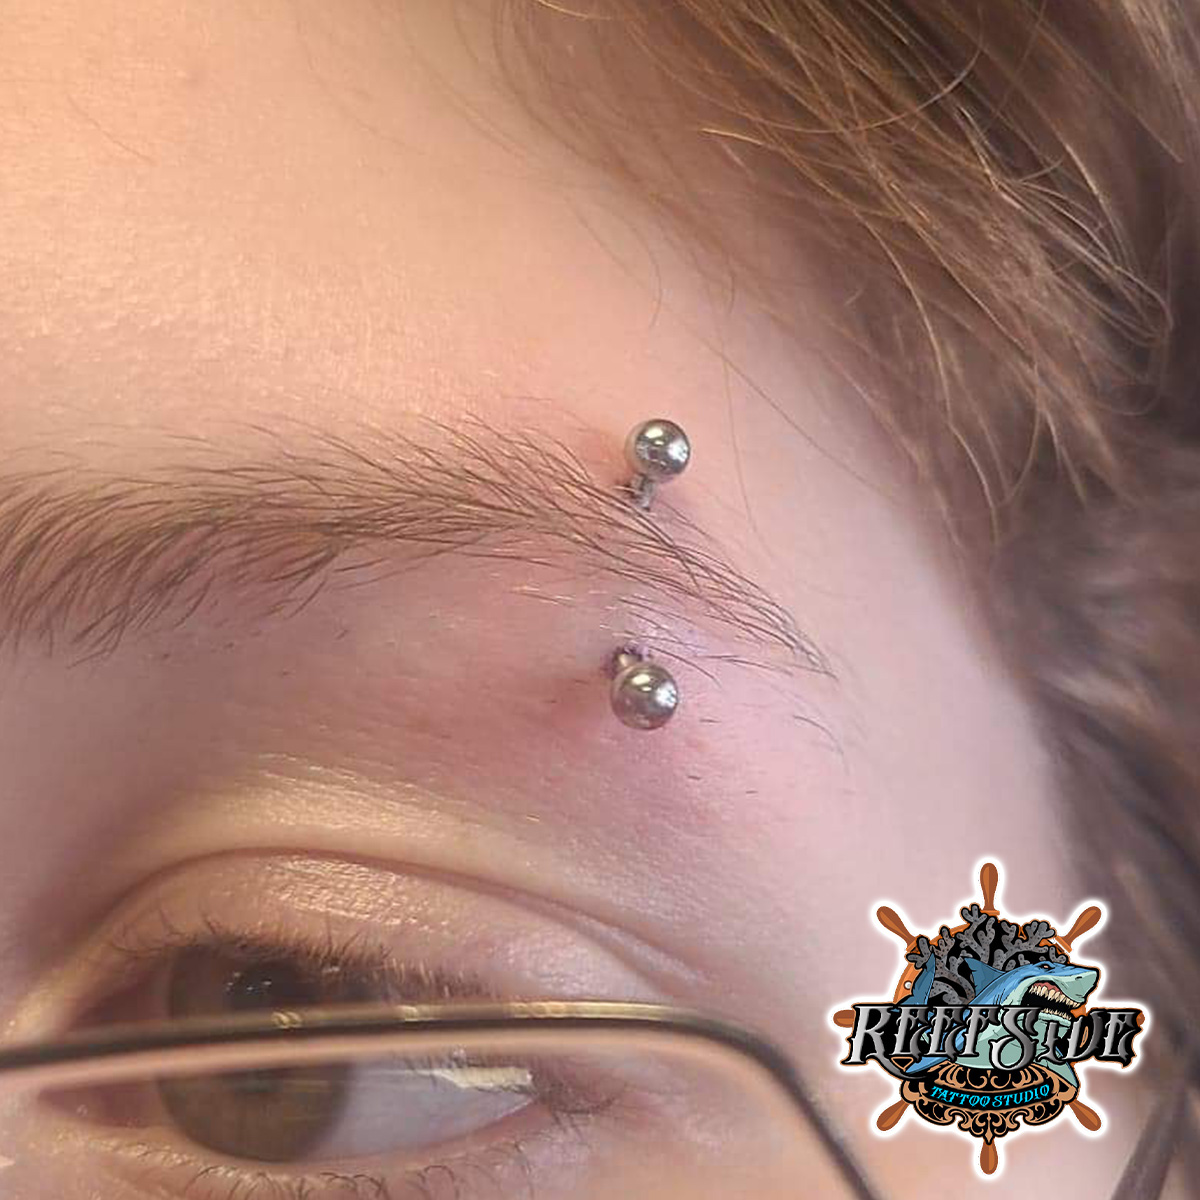
PIERCING AFTERCARE– always make sure your hands are clean. Morning and night wash with warm water and nonscented soap. Saline spray three times a day. Make sure you check your balls every day. Sometimes they like to wiggle loose.
What Not to do with your Eye Brow piercing.
DO NOT USE ANY OF THE FOLLOWING PRODUCTS:
No chlorine, no ocean water for 4 weeks. No soaking any piercings for 4 weeks. No alcohol, no peroxide, no neosporin, and do not touch, or play with your new piercing with your fingers. You do not want your oils to get into the wound, doing this and using the products listed above will cause rejection to the piercing.
Flat Piercing
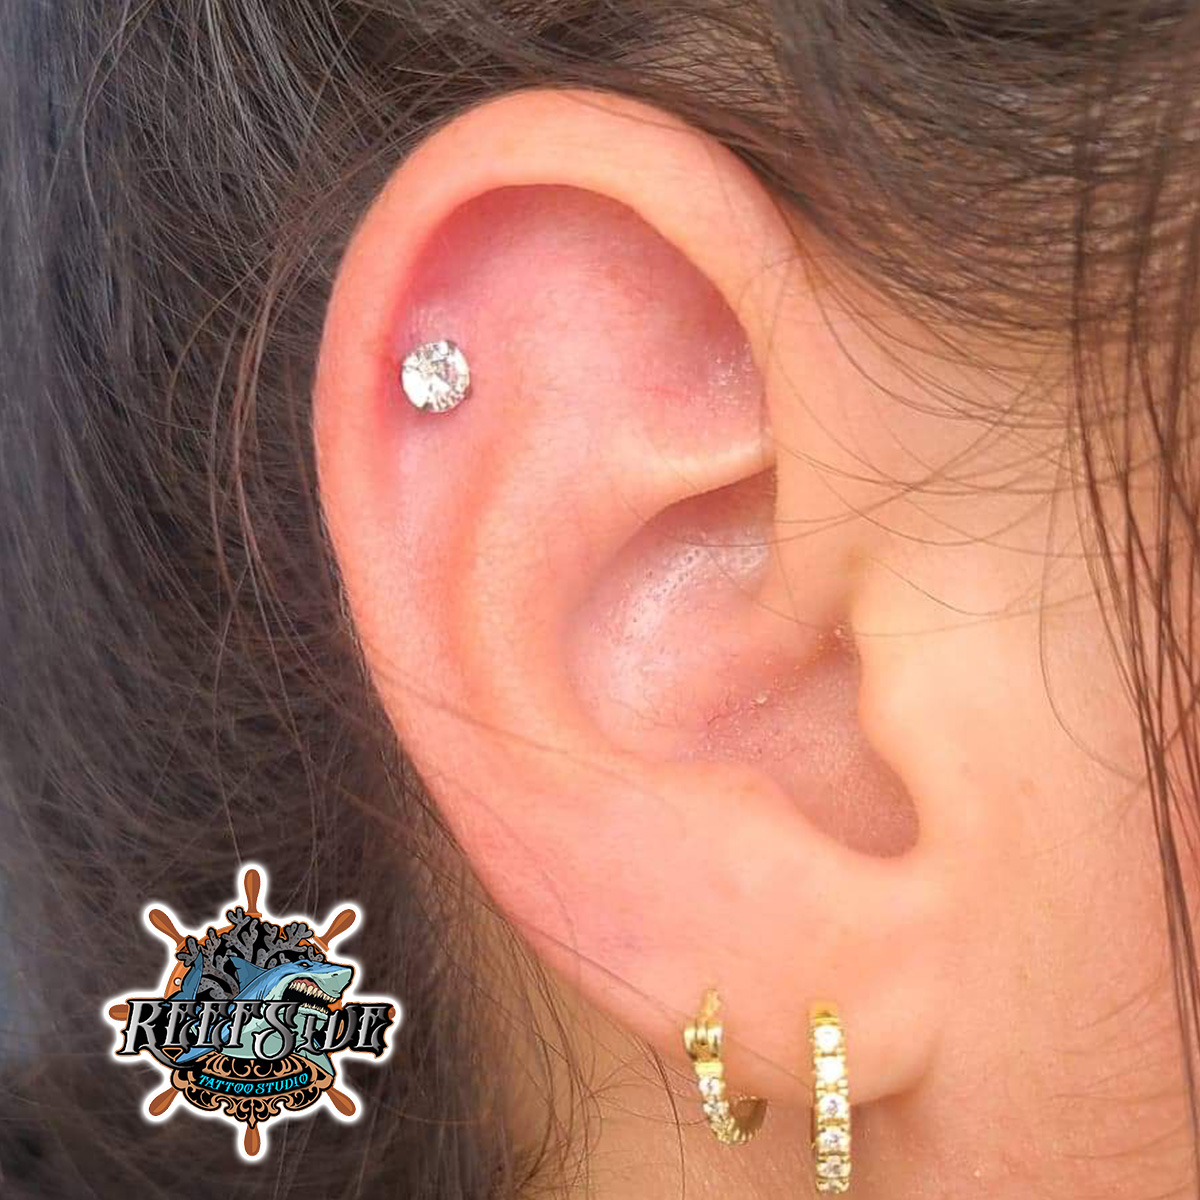
PIERCING AFTERCARE- always make sure your hands are clean. Morning and night wash with warm water and nonscented soap. Saline spray three times a day. Make sure you check your balls every day. Sometimes they like to wiggle loose.
What Not to do with your Flat piercing.
DO NOT USE ANY OF THE FOLLOWING PRODUCTS:
No chlorine, no ocean water for 4 weeks. No soaking any piercings for 4 weeks. No alcohol, no peroxide, no neosporin, and do not touch, or play with your new piercing with your fingers. You do not want your oils to get into the wound, doing this and using the products listed above will cause rejection to the piercing.
Forward Helix Piercing
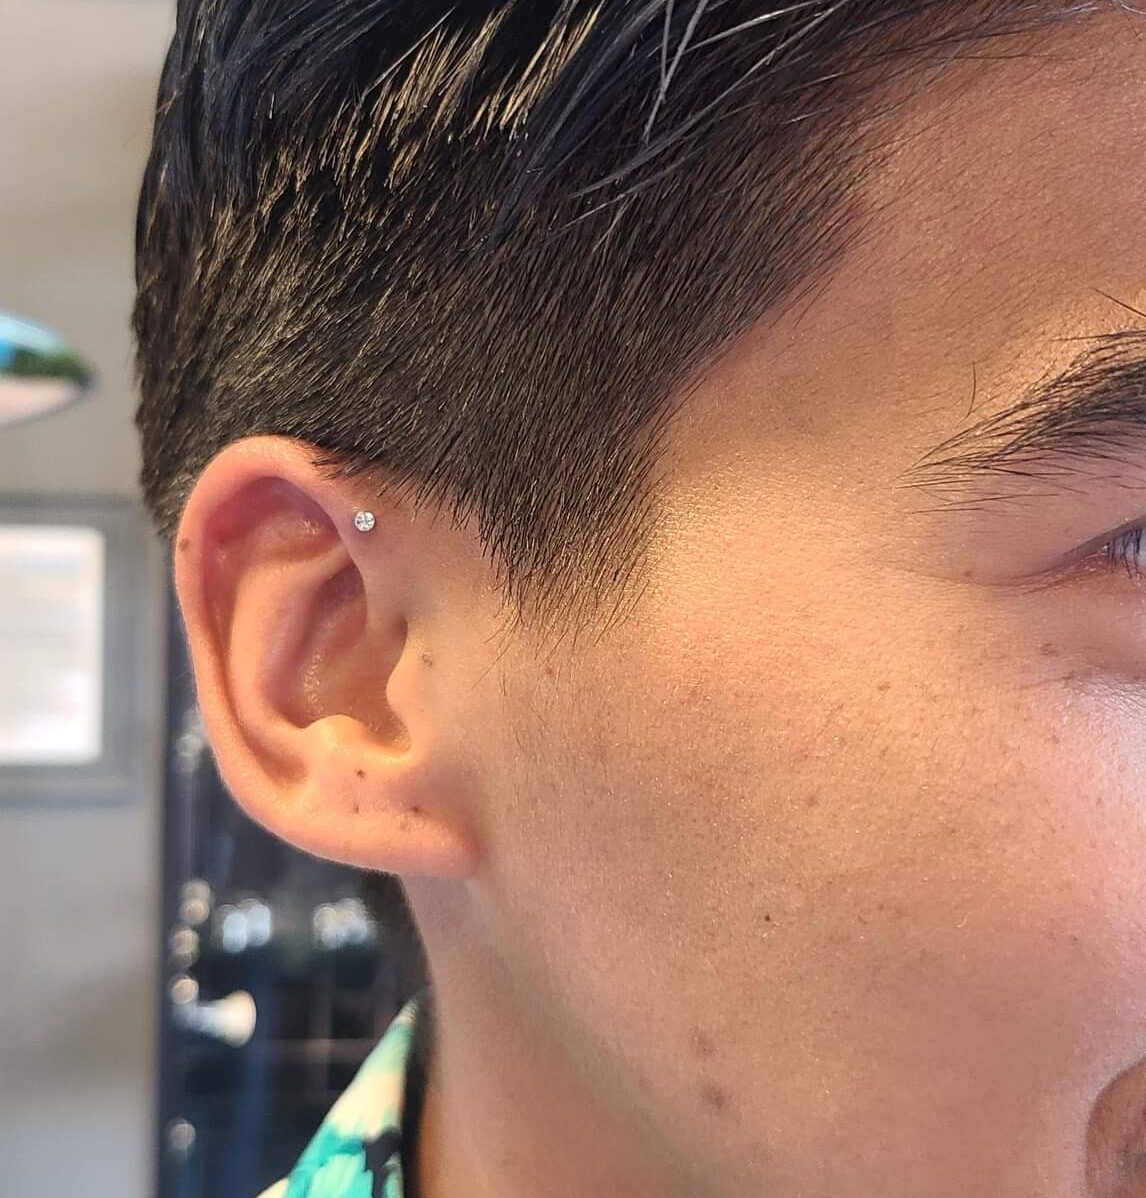
PIERCING AFTERCARE– always make sure your hands are clean. Morning and night wash with warm water and nonscented soap. Saline spray three times a day. Make sure you check your balls every day. Sometimes they like to wiggle loose.
What Not to do with your forward Helix piercing.
DO NOT USE ANY OF THE FOLLOWING PRODUCTS:
No chlorine, no ocean water for 4 weeks. No soaking any piercings for 4 weeks. No alcohol, no peroxide, no neosporin, and do not touch, or play with your new piercing with your fingers. You do not want your oils to get into the wound, doing this and using the products listed above will cause rejection to the piercing.
Helix Piercing

PIERCING AFTERCARE– always make sure your hands are clean. Morning and night wash with warm water and nonscented soap. Saline spray three times a day. Make sure you check your balls every day. Sometimes they like to wiggle loose.
What Not to do with your Helix piercing.
DO NOT USE ANY OF THE FOLLOWING PRODUCTS:
No chlorine, no ocean water for 4 weeks. No soaking any piercings for 4 weeks. No alcohol, no peroxide, no neosporin, and do not touch, or play with your new piercing with your fingers. You do not want your oils to get into the wound, doing this and using the products listed above will cause rejection to the piercing.
Industrial Piercing
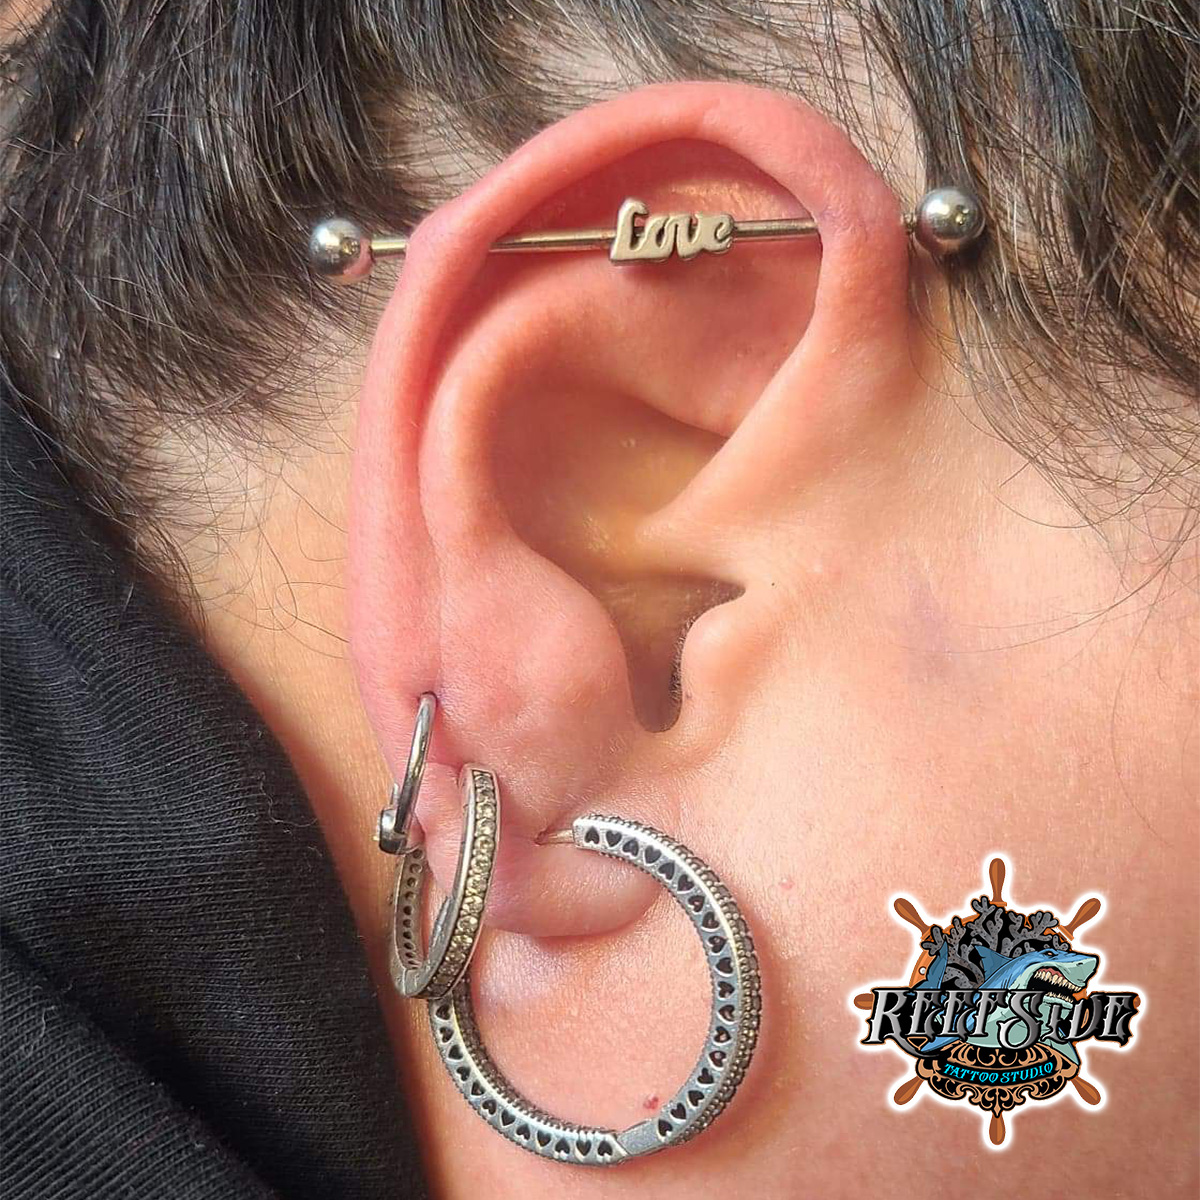
PIERCING AFTERCARE– always make sure your hands are clean. Morning and night wash with warm water and nonscented soap. Saline spray three times a day. Make sure you check your balls every day. Sometimes they like to wiggle loose.
What Not to do with your Industrial piercing.
DO NOT USE ANY OF THE FOLLOWING PRODUCTS:
No chlorine, no ocean water for 4 weeks. No soaking any piercings for 4 weeks. No alcohol, no peroxide, no neosporin, and do not touch, or play with your new piercing with your fingers. You do not want your oils to get into the wound, doing this and using the products listed above will cause rejection to the piercing.
Jestrum piercing

PIERCING AFTERCARE– always make sure your hands are clean. Morning and night wash with warm water and nonscented soap. Saline spray three times a day. Make sure you check your balls every day. Sometimes they like to wiggle loose.
What Not to do with your Jestrum piercing.
DO NOT USE ANY OF THE FOLLOWING PRODUCTS:
No chlorine, no ocean water for 4 weeks. No soaking any piercings for 4 weeks. No alcohol, no peroxide, no neosporin, and do not touch, or play with your new piercing with your fingers. You do not want your oils to get into the wound, doing this and using the products listed above will cause rejection to the piercing.
Vertical Libre piercing
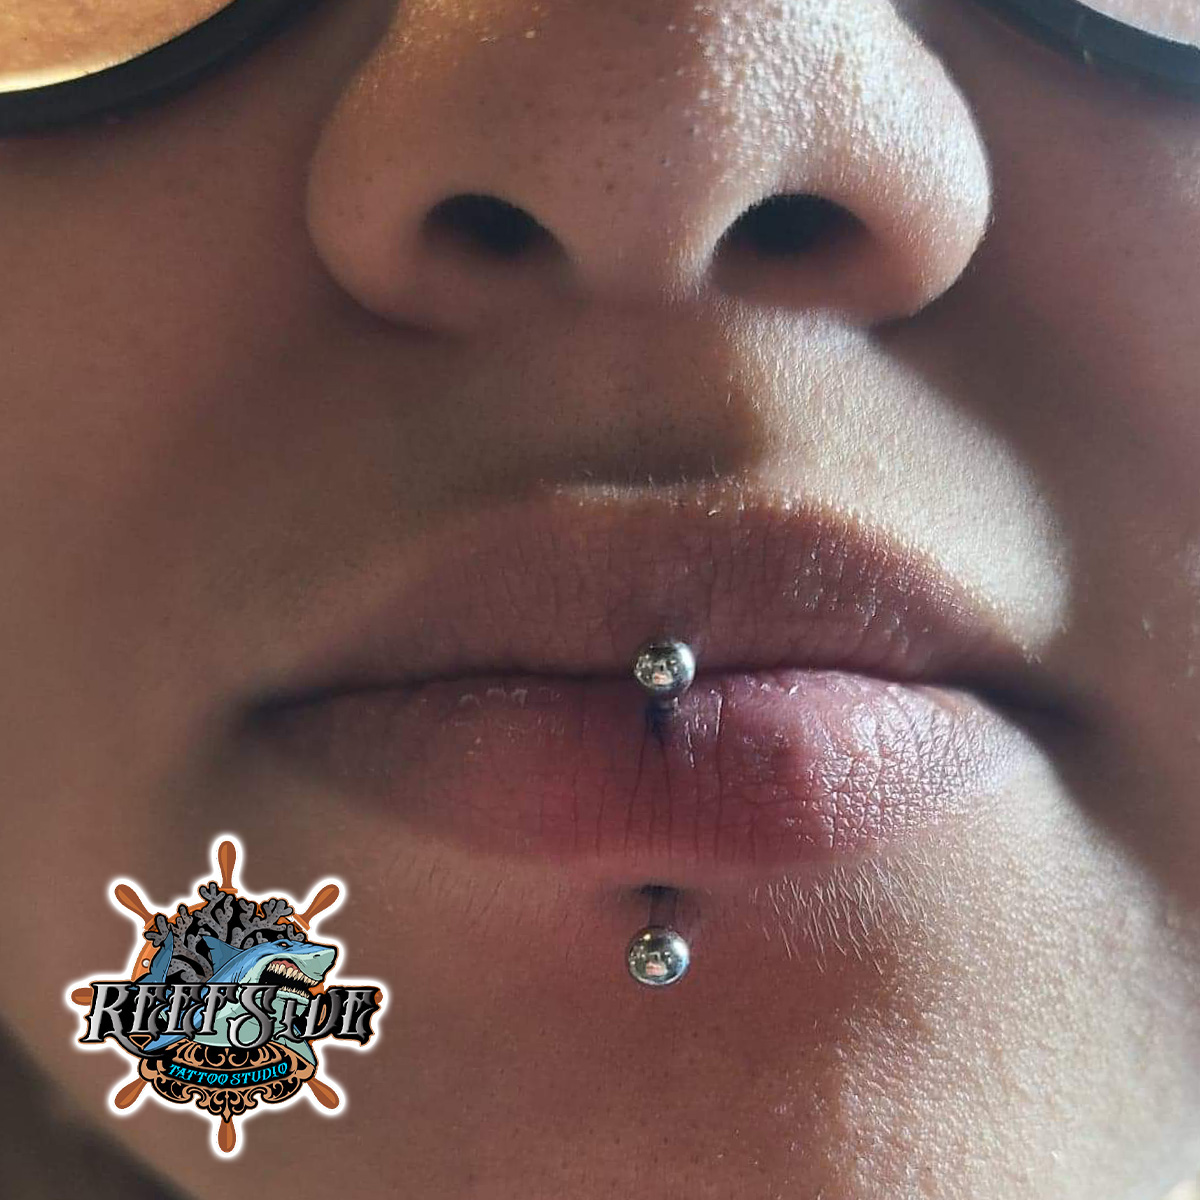
Vertical lip piercings heal in about 6 to 8 weeks. The healing process may be longer or shorter than this depending on how well you take care of the piercing area.
PIERCING AFTERCARE– always make sure your hands are clean. Morning and night wash with warm water and nonscented soap. Saline spray three times a day. Make sure you check your balls every day. Sometimes they like to wiggle loose.
What Not to do with your Vertical Libre piercing.
DO NOT USE ANY OF THE FOLLOWING PRODUCTS:
No chlorine, no ocean water for 4 weeks. No soaking any piercings for 4 weeks. No alcohol, no peroxide, no neosporin, and do not touch, or play with your new piercing with your fingers. You do not want your oils to get into the wound, doing this and using the products listed above will cause rejection to the piercing.
Belly/Navel Piercing
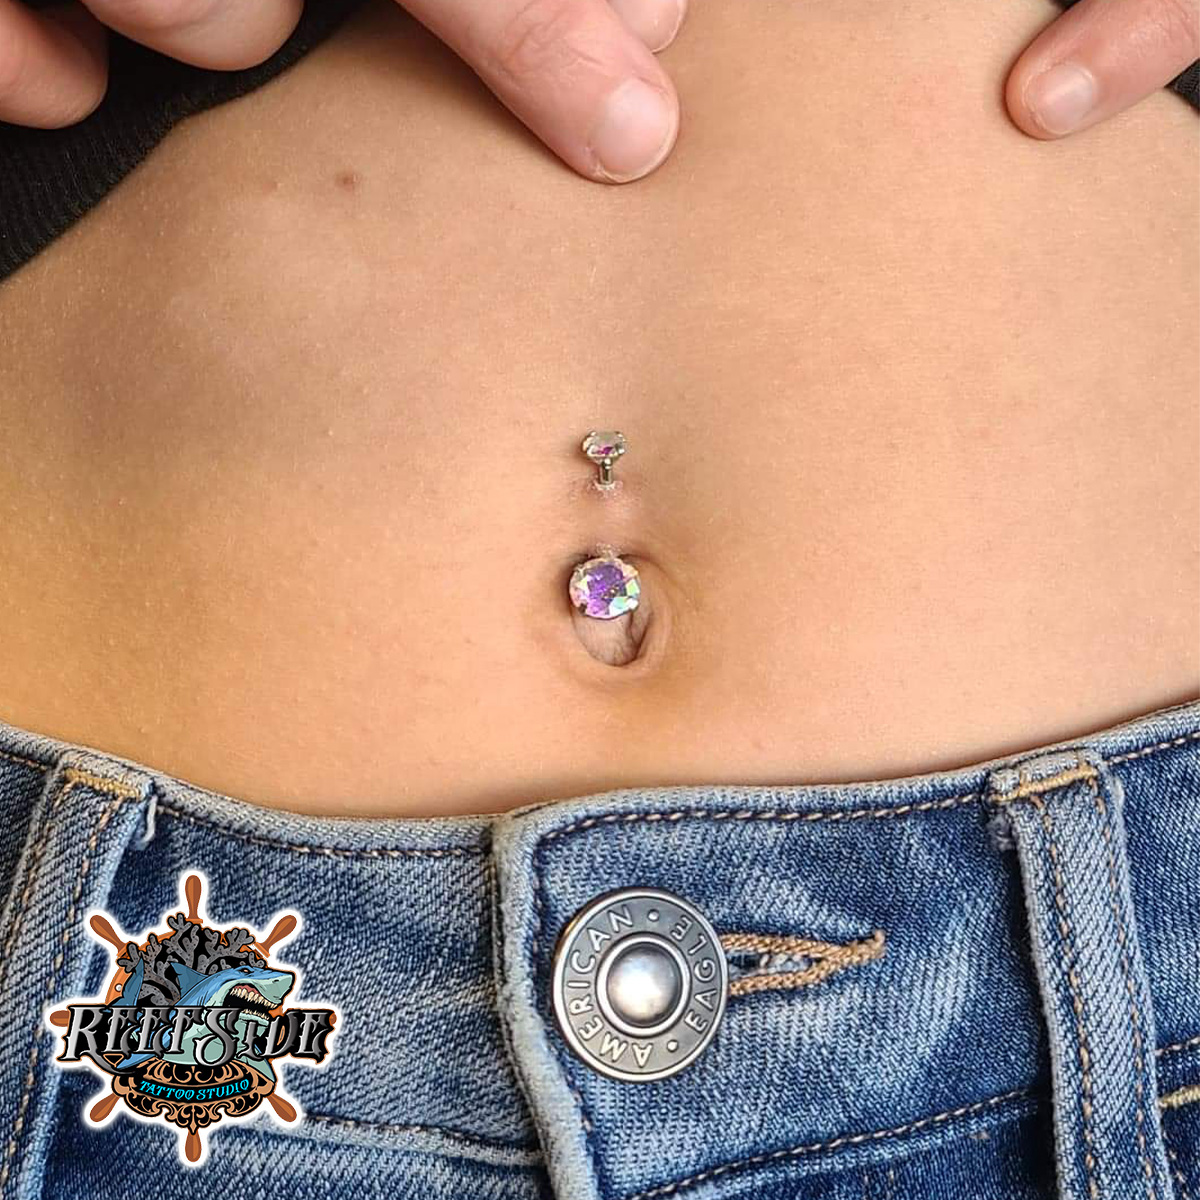
PIERCING AFTERCARE– always make sure your hands are clean. Morning and night wash with warm water and nonscented soap. Saline spray three times a day. Make sure you check your balls every day. Sometimes they like to wiggle loose.
What Not to do with your Belly/Navel piercing.
DO NOT USE ANY OF THE FOLLOWING PRODUCTS:
No chlorine, no ocean water for 4 weeks. No soaking any piercings for 4 weeks. No alcohol, no peroxide, no neosporin, and do not touch, or play with your new piercing with your fingers. You do not want your oils to get into the wound, doing this and using the products listed above will cause rejection to the piercing.
Nose Piercing
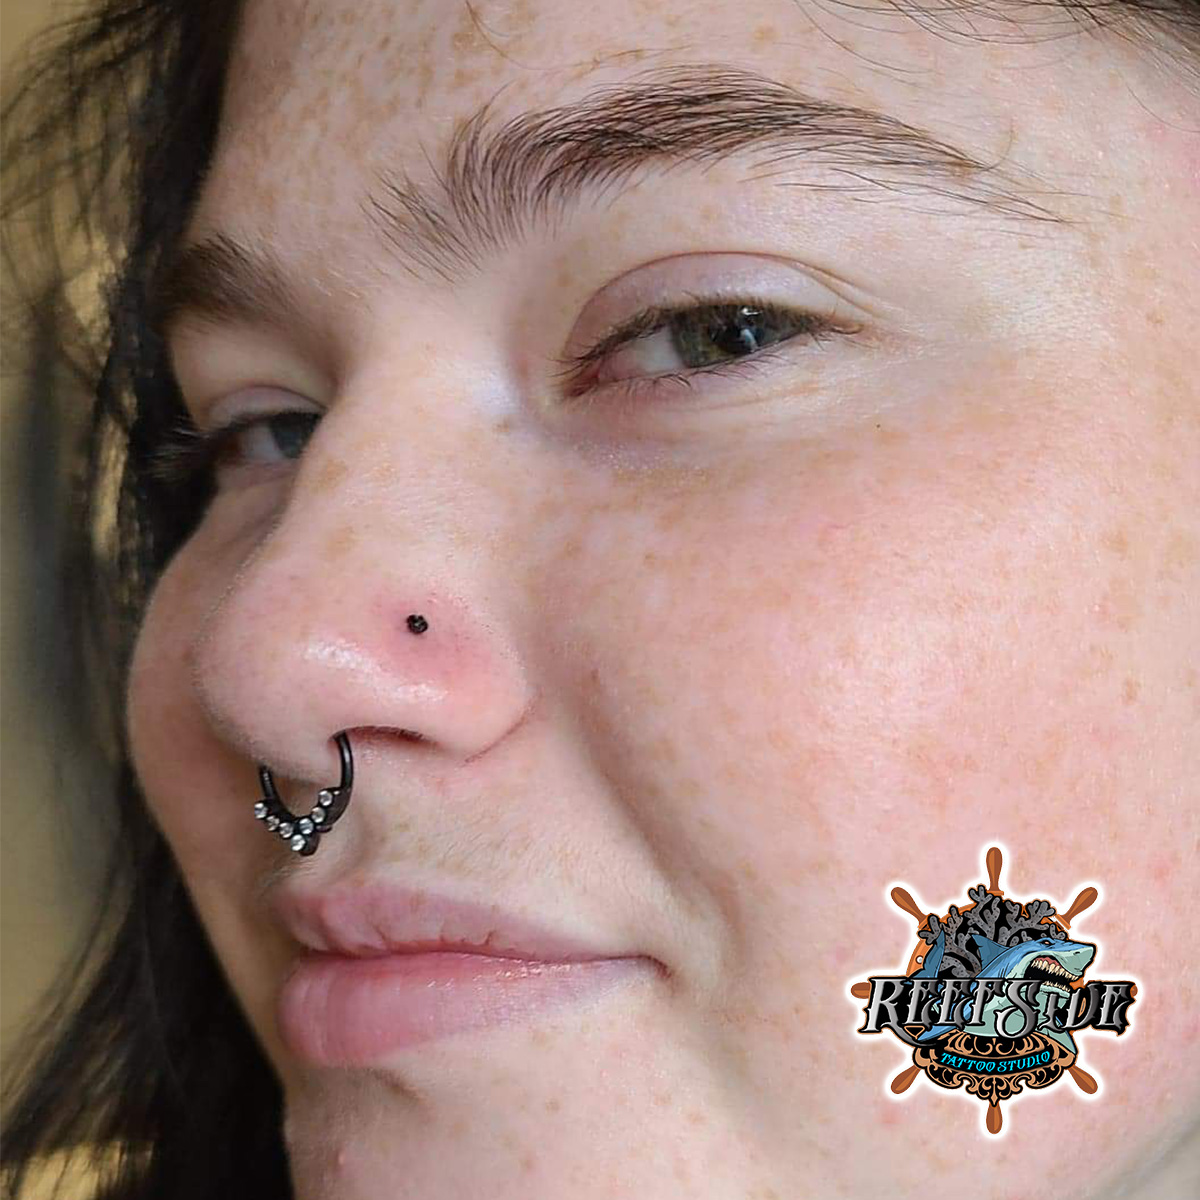
NOTE: the most commen
PIERCING AFTERCARE– always make sure your hands are clean. Morning and night wash with warm water and nonscented soap. Saline spray three times a day. Make sure you check your balls every day. Sometimes they like to wiggle loose.
What Not to do with your Nose piercing.
DO NOT USE ANY OF THE FOLLOWING PRODUCTS:
No chlorine, no ocean water for 4 weeks. No soaking any piercings for 4 weeks. No alcohol, no peroxide, no neosporin, and do not touch, or play with your new piercing with your fingers. You do not want your oils to get into the wound, doing this and using the products listed above will cause rejection to the piercing.
Piercing bump vs. keloid: How to tell the difference
Skin changes can occur at the site of piercings. These changes are not always a cause for concern. For example, piercing bumps are harmless and may go away over time. However, keloid scars can continue to get bigger.
Although piercing bumps and keloid scars can initially look similar, there are ways to differentiate between them.
In this article, we explain what piercing bumps and keloids are and how to tell the difference between the two. We also discuss the treatment options for both, as well as the other conditions that may cause skin issues after getting a piercing.
What are piercing bumps?
Piercing bumps are small lumps that can appear after a piercing. They often occur following cartilage piercings, such as nose or upper ear piercings.
Piercing bumps occur when the body’s immune system responds to the wound and initiates the healing response. This response leads to inflammation, which is what causes the bump.
you may notice bleeding, bruising, and some swelling at the site of the piercing in the first few weeks after getting it. These symptoms are all normal. Other symptoms that are not typically a cause for concern may include:
- itching
- some whitish fluid coming from the site of the wound
- crusting around the piercing jewelry.
A keloid is a raised scar that occurs as a result of trauma or injury to the skin. Sometimes, this type of scar may appear after a piercing.
A keloid forms due to an overgrowth of fibrous tissue. In response to injury, cells in the skin — called fibroblasts — produce excessiveTrusted Source collagen, which leads to the development of a keloid.
Keloids can take 3–12 months to develop after the original injury. They start as raised scars that can be pink, red, purple, or brown and typically become darker over time. The appearance can depend on the location of the keloid, as well as the person’s skin tone.
Earlobe keloid scars are likely to be round or oval. They can continue to grow over time — either quickly or slowly — and can become very large.
The texture of keloids can differ. They can feel soft and doughy or hard and rubbery. Other symptoms that a person with a keloid scar may experience include:
- pain
- itchiness
- tenderness
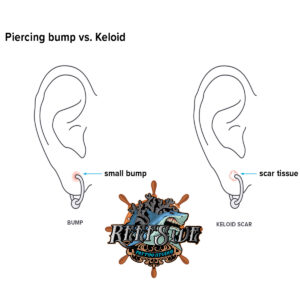
Treatment for piercing and keloids bumps.
Piercing bumps are part of the body’s natural response to injury, and they do not typically require treatment. However, people can take steps to keep the area clean, prevent infection, and allow the piercing to heal. These include:
- keeping piercing jewelry in, without changing or removing it, for at least 6 weeks
- washing the hands before touching the piercing
- washing the piercing with a saline solution or gentle soap and water once a day
- patting the area dry with a clean cotton pad after bathing or showering and avoiding using a towel, which can introduce bacteria
Although the American Academy of Dermatology (AAD) suggest applying rubbing alcohol to the piercing, the general guidance is to avoid doing this as it can slow healing.
Various treatment options are available for keloids. The appropriate treatment option can depend on several factors, including the type and size of the keloid. Treatment options include:
- Corticosteroids: This type of medicine can help shrink the keloid. The AAD note that people require about four injections on average, having one every 3–4 weeks. They also say that 50–80% of keloids shrink after corticosteroid injection.
- Surgery: A specialist can surgically remove the keloid. However, keloids can return, even after surgical removal.
- Laser treatment: Laser treatment can help flattenTrusted Source the keloid scar and make it fade.
- Cryotherapy: This treatment is appropriate to use on small keloids. During cryotherapy, a doctor freezes the keloid to soften it and reduce its size. Cryotherapy is not suitable for people with darker skin, due to the possibility of skin pigmentation changes.
The AAD recommend that people who know that they are prone to keloids avoid getting piercings.
How long does it take for a tattoo to heal?
Skin around larger tattoos takes longer to recover and certain factors, like picking at the scabs, not moisturizing, forgoing SPF, or using a lotion with alcohol may slow the process.
What are the stages when healing a tattoo?
Week 1
The first stage lasts from day 1 through about day 6. Your new tattoo will be bandaged for the first few hours, after which it’s considered an open wound. Your body will be responding to injury, and you may notice redness, oozing, slight inflammation or swelling, or a burning sensation.
Week 2
In this stage, you may experience Flaky skin is nothing to be concerned about — it’s a natural response, and the ink will remain intact, even if it looks like some of it’s coming off.
Try to resist scratching or picking at scabs. A moisturizer recommended by a tattoo artist or doctor can keep the skin around the tattoo hydrated, and it may ease itching.
Weeks 3 and 4
Your tattoo may begin to dry out, and the itchiness should pass. If it doesn’t and redness persists, it could be an early sign of an infection. Your tattoo may appear less vibrant than expected, but that’s because a layer of dry skin has formed over it.
This will naturally exfoliate itself, revealing the vivid tattoo. Resist the urge to pick or scratch, which could cause scarring.
Months 2 to 6
Itching and redness should have subsided by this point, and your tattoo may look fully healed, though it’s smart to continue with aftercare. Long-term care for a tattoo includes staying hydrated, wearing SPF or sun-protective clothing, and keeping the tattoo clean.
How to reduce healing time
Everyone wants their tattoo to heal quickly, but the reality is that like with any wound, it needs time and care. There are some things you can do to speed up the healing process.
Cover tattoo with clothing
Sunlight can cause your tattoo to fade, and fresh tattoos are especially sensitive to the sun. Cover the tattoo with loose clothes like long sleeves or pants when you are out in the sun. Do not apply a sunscreen until the tattoo has fully healed.
Don’t re-bandage after you take off the initial dressing
Your tattoo needs to breathe, so once you remove the original bandage — usually it’ll be bandaged in clear plastic or surgical wrap by the artist — it’s best not to cover it. Wrapping it may result in extra moisture and a lack of oxygen, which can cause scabbing and slow healing.
Clean daily
You should use lukewarm — not hot, which may hurt the skin — and sterile waterTrusted Source to clean your tattoo at least two to three times a day.
Before you begin, make sure your hands are thoroughly clean using an antibacterial soap. Then, splash water onto the tattoo, follow with fragrance-free and alcohol-free soap, and either let the tattoo air dry or gently dry it with a clean paper towel.
Apply ointment
Your tattoo needs air to heal, so it’s best to skip heavy products like Vaseline unless specifically recommended by your artist.
In the first few days, your artist will likely advise using products with vitamins A and D. After a few days, you can switch to a lighter, fragrance-free aftercare moisturizer or even pure coconut oil.
Don’t scratch or pick
Scabbing is a healthy part of the healing process, but picking or scratching or iching can delay the healing process and may affect the integrity of the tattoo or result in scarring
Avoid scented products
It’s crucial to avoid scented lotions and soaps on your tattoo, and depending on where your tattoo is located, you may even want to switch to unscented shampoo, conditioner, and bodywash. Fragrances in products can cause a reaction when it comes into contact with tattoo ink.

It’s okay for the tattoo to get wet in a shower, but avoid submerging or soaking it in the shower or bath, and definitely don’t swim for the first 2 weeks.
It’s important to know the signs that your tattoo isn’t healing properly or has become infected. Symptoms of improper healing include:
- Fever or chills. A fever may indicate that your tattoo has become infected, and you should see a doctor right away.
- Prolonged redness. All tattoos will be somewhat red for a few days after the procedure, but if the redness doesn’t subside, it’s a sign that your tattoo isn’t healing well.
- Oozing fluid. If fluid or pus is still coming out from your tattoo after 2 or 3 days, it may be infected. See a doctor.
- Swollen, puffy skin. It’s normal for the tattoo to be raised for a few days, but the surrounding skin shouldn’t be puffy. This may indicate that you’re allergic to the ink.
- Severe itching or hives. Itchy tattoos can also be a sign that your body is allergic to the ink. The allergic reaction to a tattooTrusted Source can happen right after, or as much as several years after getting the tattoo.
- Scarring. Your tattoo will scab over because it’s a wound, but a properly healed tattoo shouldn’t scar. Signs of scarring include raised, puffy skin, redness that doesn’t fade, distorted colors within the tattoo, or pitted skin.
After getting a new tattoo, the outer layer of skin will typically appear healed within 2 to 3 weeks. However, the healing process can take upward of 6 months.
Aftercare, which includes daily cleaning, ointment, or moisturizer, should continue for at least this long to reduce the risk of infection or other complications.
Rook Piercing
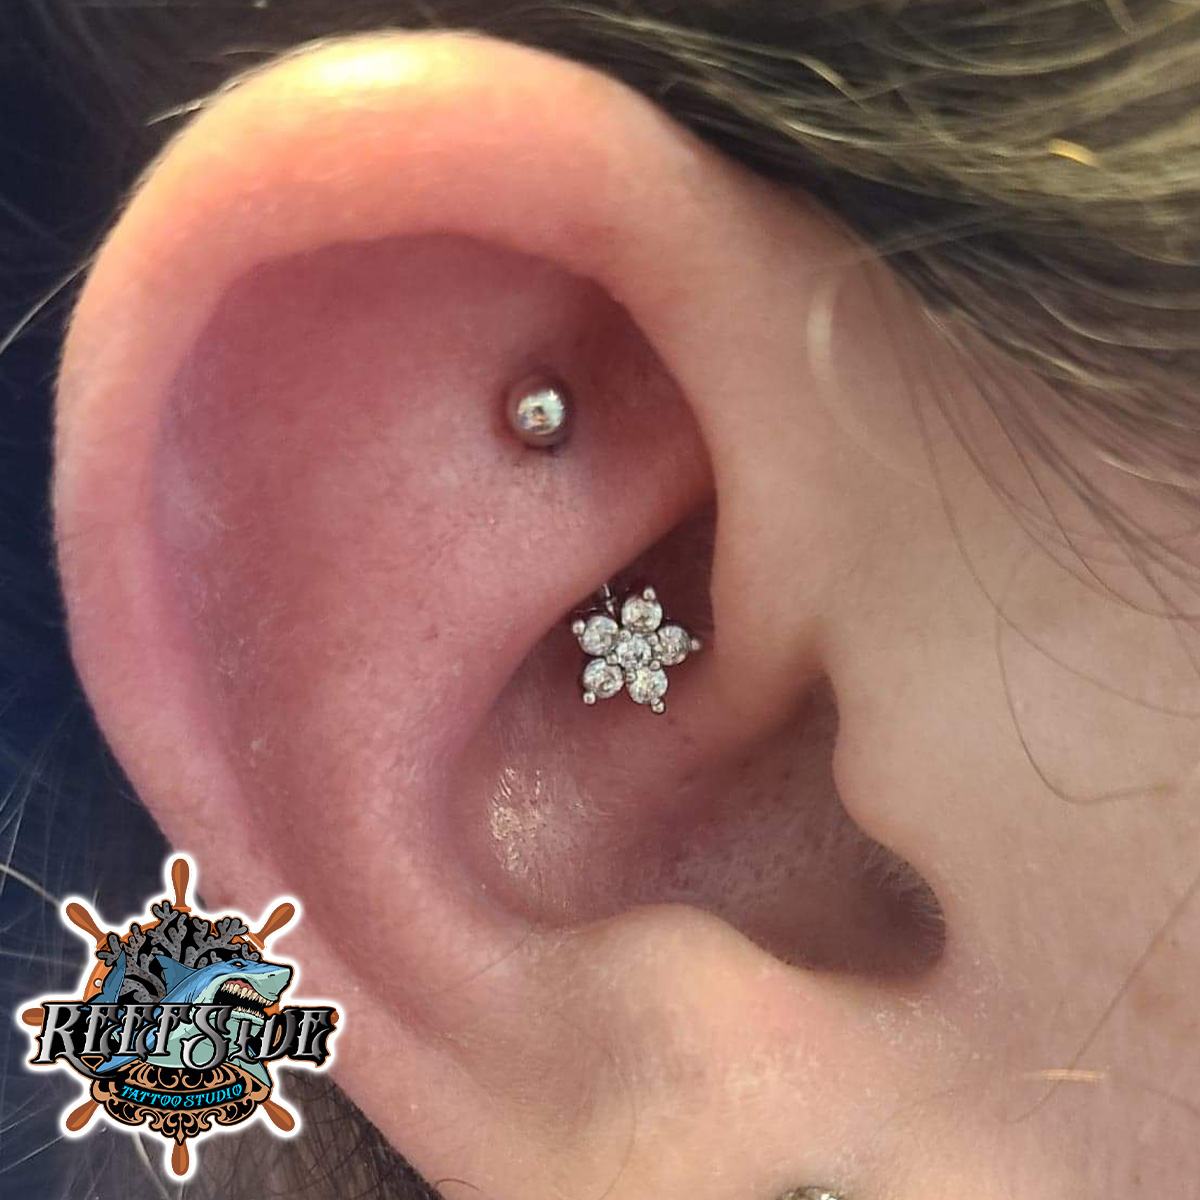
PIERCING AFTERCARE– always make sure your hands are clean. Morning and night wash with warm water and nonscented soap. Saline spray three times a day. Make sure you check your balls every day. Sometimes they like to wiggle loose.
What Not to do with your Rook piercing.
DO NOT USE ANY OF THE FOLLOWING PRODUCTS:
No chlorine, no ocean water for 4 weeks. No soaking any piercings for 4 weeks. No alcohol, no peroxide, no neosporin, and do not touch, or play with your new piercing with your fingers. You do not want your oils to get into the wound, doing this and using the products listed above will cause rejection to the piercing.
Septum Piercing
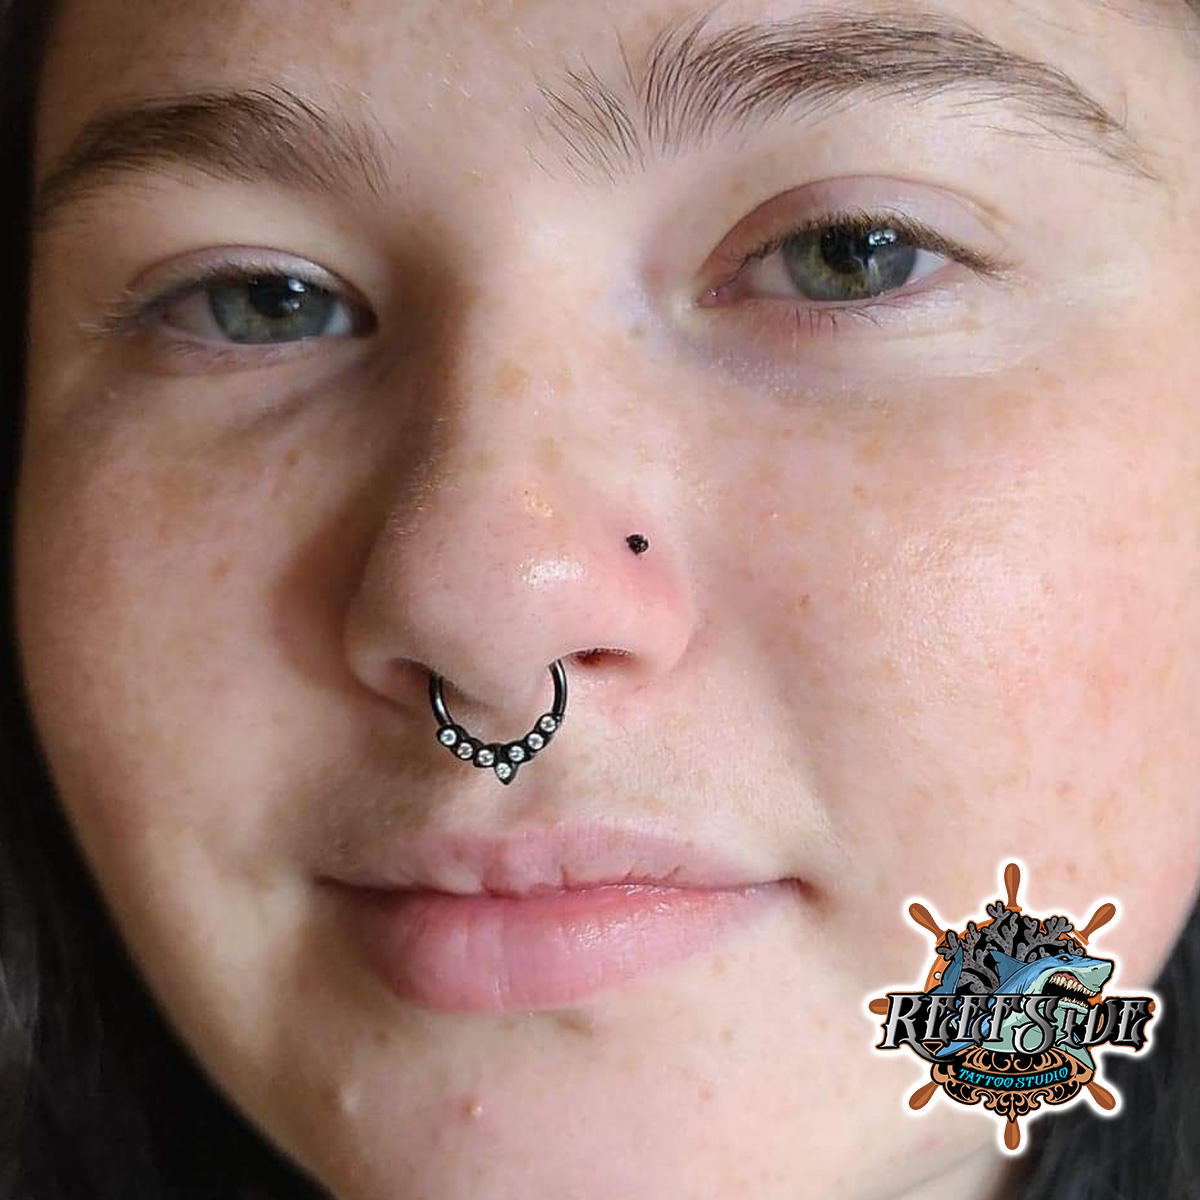
PIERCING AFTERCARE– always make sure your hands are clean. Morning and night wash with warm water and nonscented soap. Saline spray three times a day. Make sure you check your balls every day. Sometimes they like to wiggle loose.
What Not to do with your septum piercing.
DO NOT USE ANY OF THE FOLLOWING PRODUCTS:
No chlorine, no ocean water for 4 weeks. No soaking any piercings for 4 weeks. No alcohol, no peroxide, no neosporin, and do not touch, or play with your new piercing with your fingers. You do not want your oils to get into the wound, doing this and using the products listed above will cause rejection to the piercing.
Single Lobe Piercing
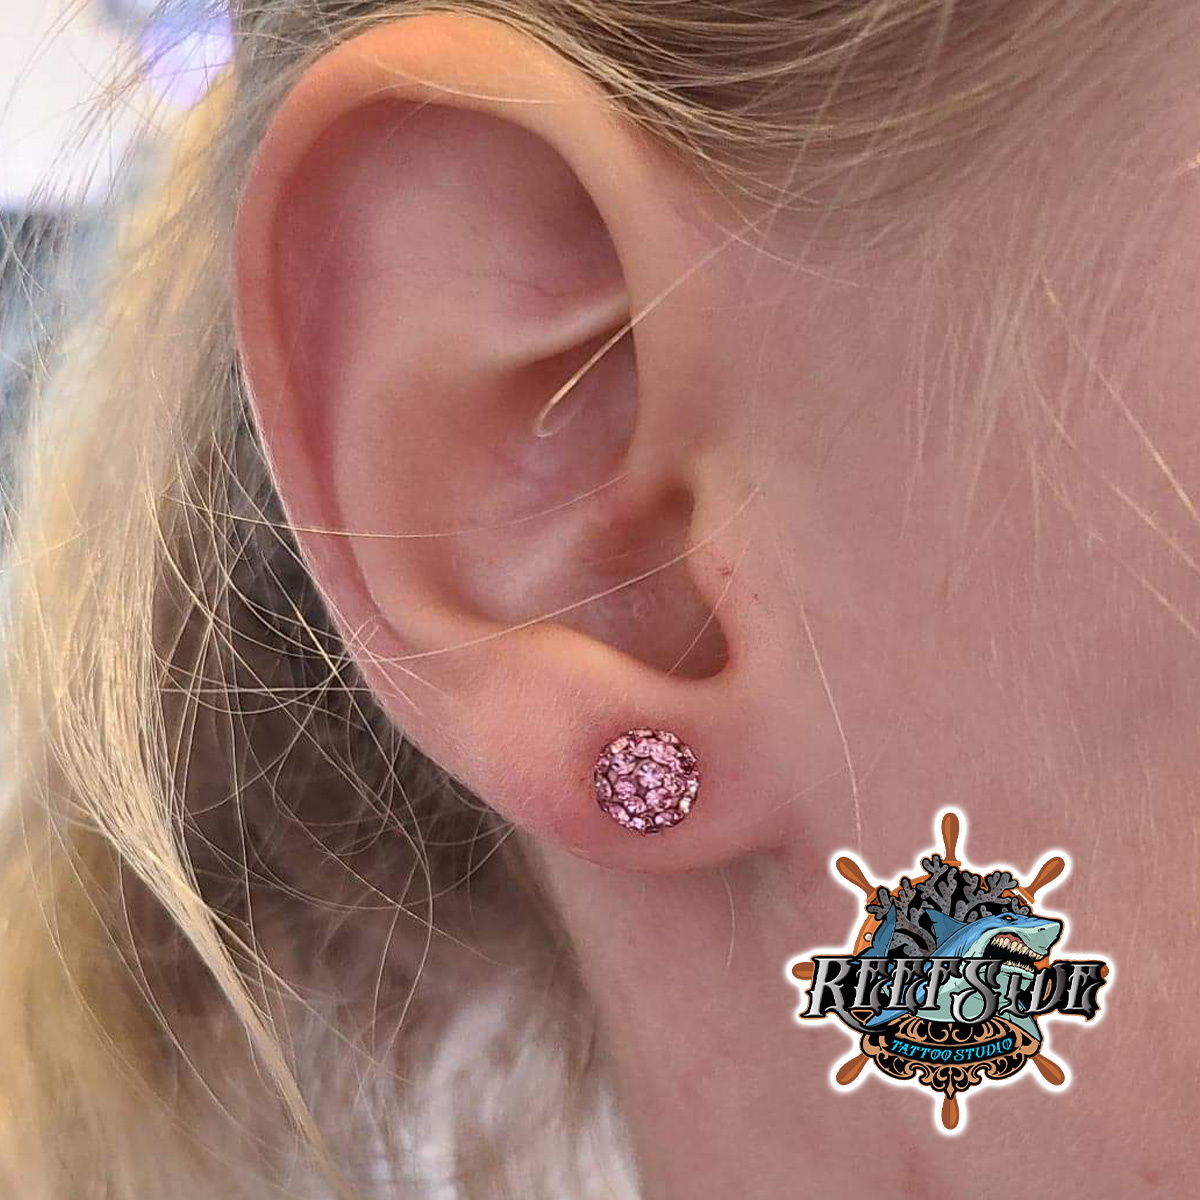
PIERCING AFTERCARE– always make sure your hands are clean. Morning and night wash with warm water and nonscented soap. Saline spray three times a day. Make sure you check your balls every day. Sometimes they like to wiggle loose.
What Not to do with your lobe piercing.
DO NOT USE ANY OF THE FOLLOWING PRODUCTS:
No chlorine, no ocean water for 4 weeks. No soaking any piercings for 4 weeks. No alcohol, no peroxide, no neosporin, and do not touch, or play with your new piercing with your fingers. You do not want your oils to get into the wound, doing this and using the products listed above will cause rejection to the piercing.
Smiley Piercing
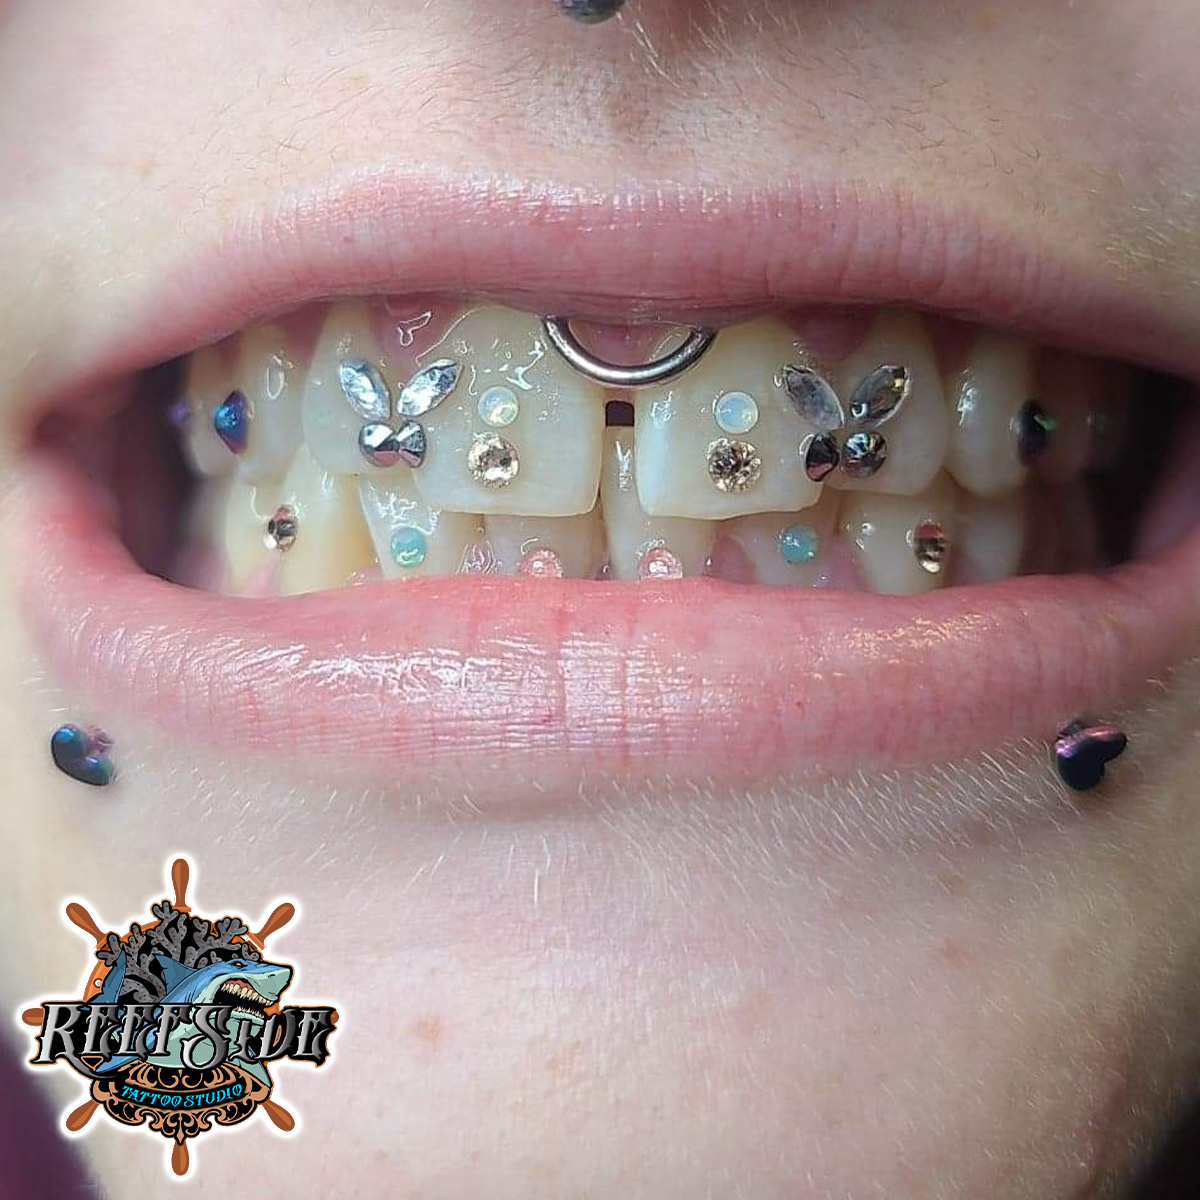
PIERCING AFTERCARE– always make sure your hands are clean. Morning and night wash with warm water and nonscented soap. Saline spray three times a day. Make sure you check your balls every day. Sometimes they like to wiggle loose.
What Not to do with your Smiley piercing.
DO NOT USE ANY OF THE FOLLOWING PRODUCTS:
No chlorine, no ocean water for 4 weeks. No soaking any piercings for 4 weeks. No alcohol, no peroxide, no neosporin, and do not touch, or play with your new piercing with your fingers. You do not want your oils to get into the wound, doing this and using the products listed above will cause rejection to the piercing.
Tragus Piercing
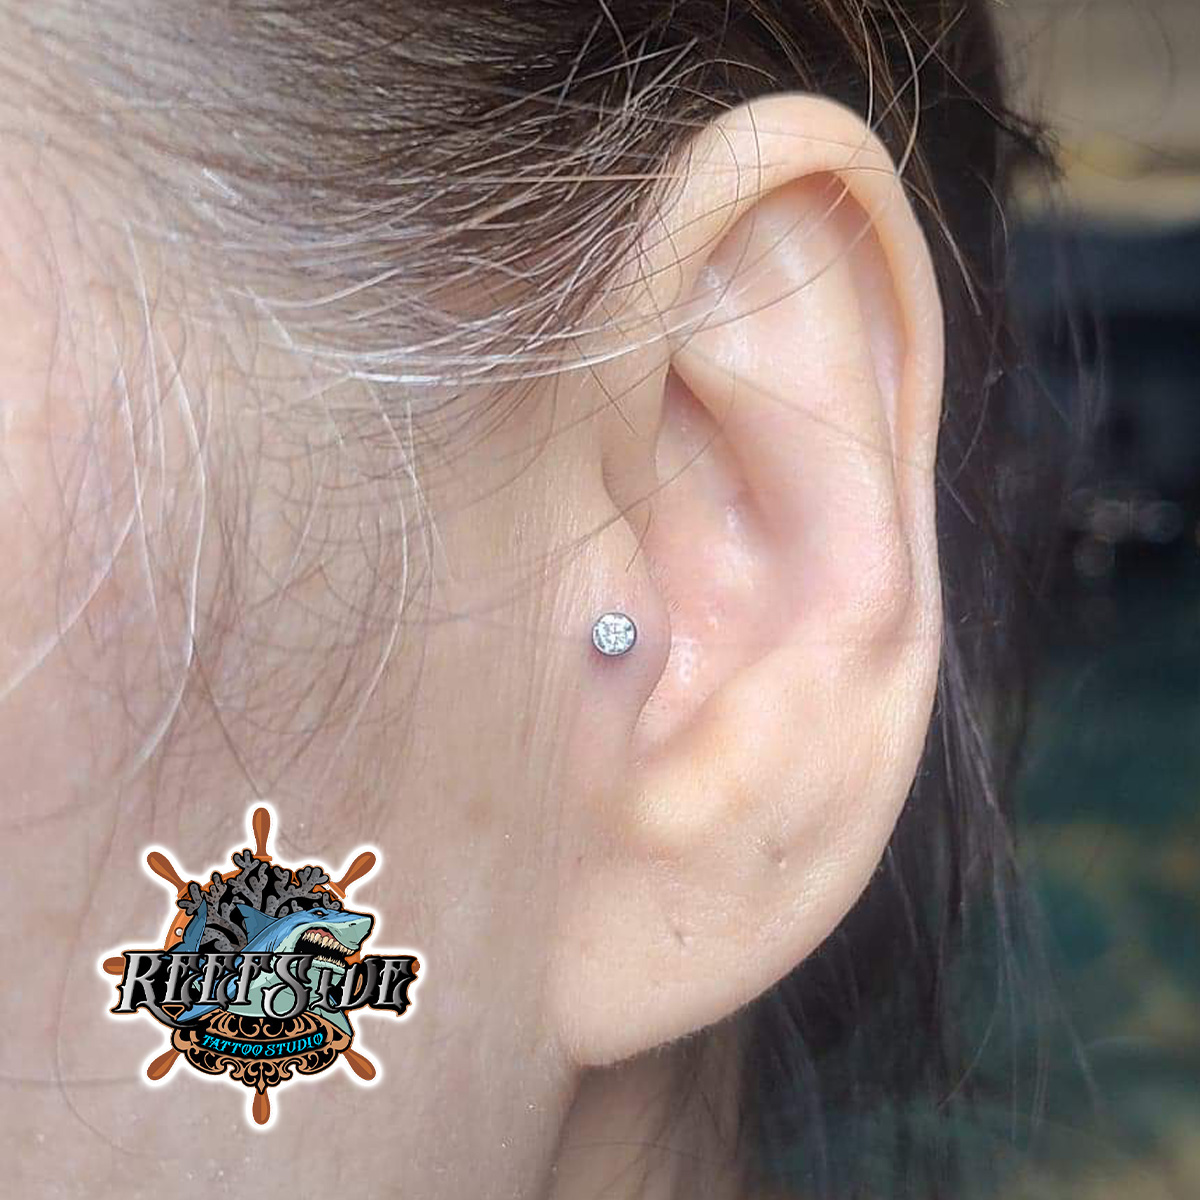
PIERCING AFTERCARE– always make sure your hands are clean. Morning and night wash with warm water and nonscented soap. Saline spray three times a day. Make sure you check your balls every day. Sometimes they like to wiggle loose.
What Not to do with your Tragus piercing.
DO NOT USE ANY OF THE FOLLOWING PRODUCTS:
No chlorine, no ocean water for 4 weeks. No soaking any piercings for 4 weeks. No alcohol, no peroxide, no neosporin, and do not touch, or play with your new piercing with your fingers. You do not want your oils to get into the wound, doing this and using the products listed above will cause rejection to the piercing.
Getting a tattoo or piercing is an exciting, and oftentimes meaningful experience. However, this process isn’t over when you leave the studio. Aftercare of your new ink or jewelry can make the difference between long-lasting body art and losing it within months. The aftercare for tattoos and piercings may seem overwhelming at first, but with proper technique, both will heal quickly and look stunning in no time! Following through with proper follow-up protocols helps ensure that your tattoo or piercing remains beautiful forever. We cover all different aspects of aftercare including cleaning instructions, lifestyle habits to adhere to while healing, as well as other tips to heal quicker and keep your modifications looking their best!
The Importance of Aftercare for Tattoos and Piercings
Aftercare for tattoos and piercings is incredibly important to ensure that your body art heals properly and looks the best it can. Properly caring for tattoos and piercings will protect them from infection and fading caused by poor aftercare, which can deplete the vibrancy of your beautiful body art and piercings. Aftercare will also help keep your skin moist, as dryness can create discomfort in some areas that have recently been tattooed or pierced. Without proper aftercare, you may actually increase the risk of pigment loss or scarring, so make sure to follow a regimented skincare routine to keep your artwork looking alive and vibrant for many years to come.
Cleaning Your Tattoo and Piercing
Taking care of your new tattoo and piercing is essential for ensuring safety, comfort, and a healthy outcome. Cleanliness is one of the most important tasks in the aftercare of both tattoos and piercings as it helps to reduce the risk of infection and identify potential complications early. Proper cleaning not only protects against infections, but also enhances the coloring of tattoos and minimizes irritations with piercings. Developing an effective cleaning regimen can help to keep your skin clean and the artwork looking vibrant for years to come. In order to maintain optimal outcomes, it is important to follow aftercare instructions given by your artist or piercer as not all products are safe for use with tattoos and piercings.
Proper Care
Proper aftercare for a new tattoo or piercing is essential for the health and longevity of the newly acquired artwork. Immediately following a session, a fresh tattoo should be kept covered to protect from direct sunlight and other external irritants, and should be washed regularly with mild soap and warm water. Piercings should also be protected from exposure to sunlight, chemicals, or any foreign material that could cause irritation. Both tattoos and piercings should typically heal in four to six weeks. However, it is important to keep up with regular cleaning and care during this time to ensure proper healing. When done correctly, both tattoos and piercings can become lifelong body decorations that you’ll never regret getting!
When to See a Doctor
When it comes to aftercare of tattoos and piercings, seeing a doctor should be your first step if any complications arise. If you notice anything out of the ordinary such as excessive redness or swelling, pus or discharge, pain that won’t go away, or a fever, it is important to act immediately and seek medical advice. Be sure to communicate with your artist about any relevant health changes that may affect the healing process such as recent illnesses or sensitivities to certain materials. Taking these steps will help to avoid further health risks that could occur if aftercare is not properly monitored.
Tattoo and Piercing Tips
Aftercare is a vital part of keeping your tattoo or piercing looking great over the years. There are a few key tips to remember when caring for these body modifications. Cleaning the area with lukewarm and mild soap is essential after each shower to prevent infection and help keep your art looking vibrant. Moisturizing the area with a natural product will help it stay healthy and guard against scabbing, fading, and cracking. Wearing sun protection when going out in the sun is extremely important as UV rays can drastically dull colors and damage healed piercings. Try to keep your new tattoo out of direct sunlight for a few weeks following a new tattoo. Following these steps ensures that your tattoo or piercing will look amazing for years to come!
Results May Vary!
Taking care of a new tattoo or piercing after the procedure is crucial to ensuring the best results and avoiding any potential complications. When you’re not seeing the type of progress that you had hoped for, there are several steps you can take. Make sure that you are diligently following your doctor’s instructions, maybe even more intensely than before if their instructions are to do so. Also, it could be helpful to contact your doctor for advice. They may be able to recommend topical creams or other treatments that could help speed up the recovery process. Additionally, eating a healthy diet and getting plenty of exercise can help keep your skin strong and healthy in order to allow for optimal healing. Remember, any changes in your aftercare routine should always consult with your physician first; never try a new product or treatment without consulting your medical provider first!
Keeping your tattoo and piercing clean and properly cared for is an essential part of maintaining the health of the design and preventing infection. Taking the time to keep up with these simple steps can help ensure that your new body art looks its best for years to come. If at any point you notice a complication with your tattoo or piercing, be sure to seek medical attention right away. At Reef Side Tattoo, we have a dedicated team of professionals who are committed to providing you with quality aftercare services and advice. Our certified artists stand ready to provide you with any tips for preventive or corrective care you may need, no matter what type of piercing or tattoo you have received. Don’t hesitate to reach out if you have any questions!
About Reef Side
Reef Side Tattoo & Piercing is a Tattoo & Piercing company located in west Melbourne, Florida. Reef Side Tattoo and Piercing was awarded by numerous and reputable organizations Learn more about Reef Side Tattoo and Piercing
PHONE: 321.622.5801
EMAIL: reefsidetattoo@gmail.com
Reef Side Tattoo Location
2447 N Wickham Rd #124, Melbourne, FL 32935


